Bayonet Ring (BZ3 | BZ5 | BZ68 | BZ10) Manual
Overview:
Install Guide:
Specifications:
Introduction
Thank you for purchasing our Bayonet Ring. At Origin Acoustics, we take pride in providing you with a high-quality product. All of Origin Acoustics’ speakers are designed to have excellent sound quality, longevity, and a simple installation process.
This instruction booklet covers the necessary information for a smooth installation, including: the tools you will need, step-by-step instructions for installation, troubleshooting tips for any errors that may occur, and all warranty information. If for any reason you experience problems or if you have installation questions please call us at (844) 674-4461. Hours of operation are 8:00am to 5:00pm (Pacific Time), Monday through Friday.
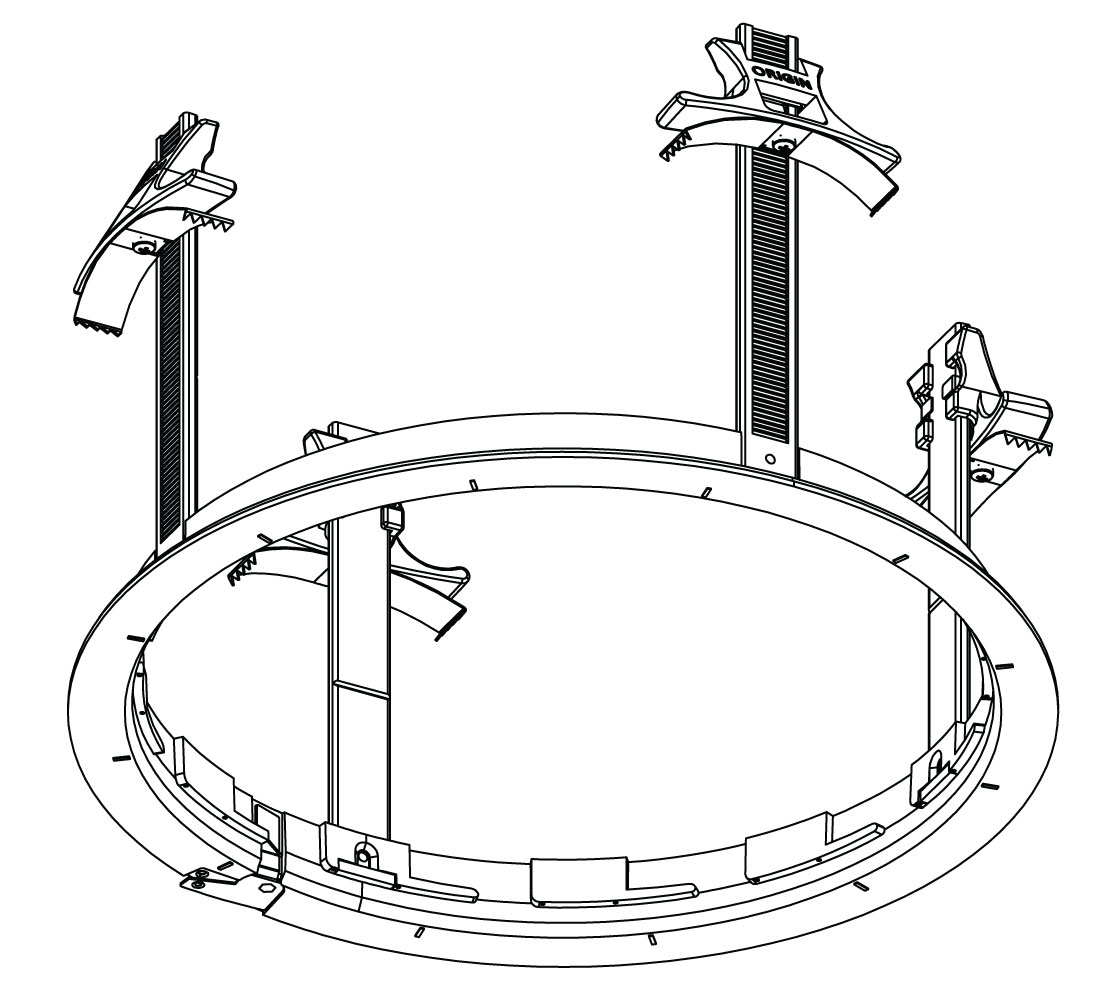
What’s Included
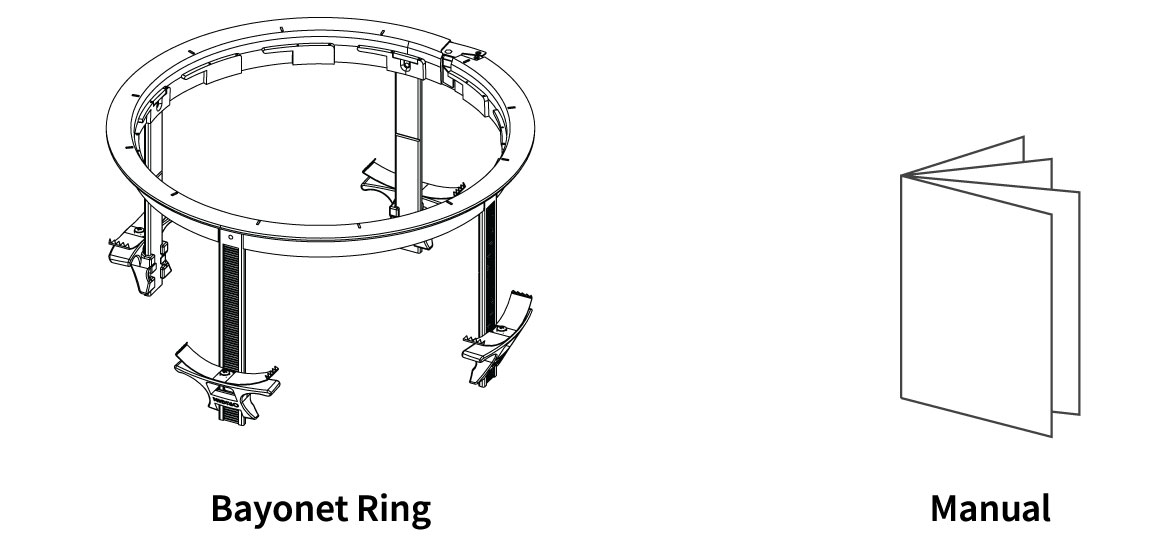
Bayonet Ring Features
A) BAYONET RING To be inserted within in-ceiling hole
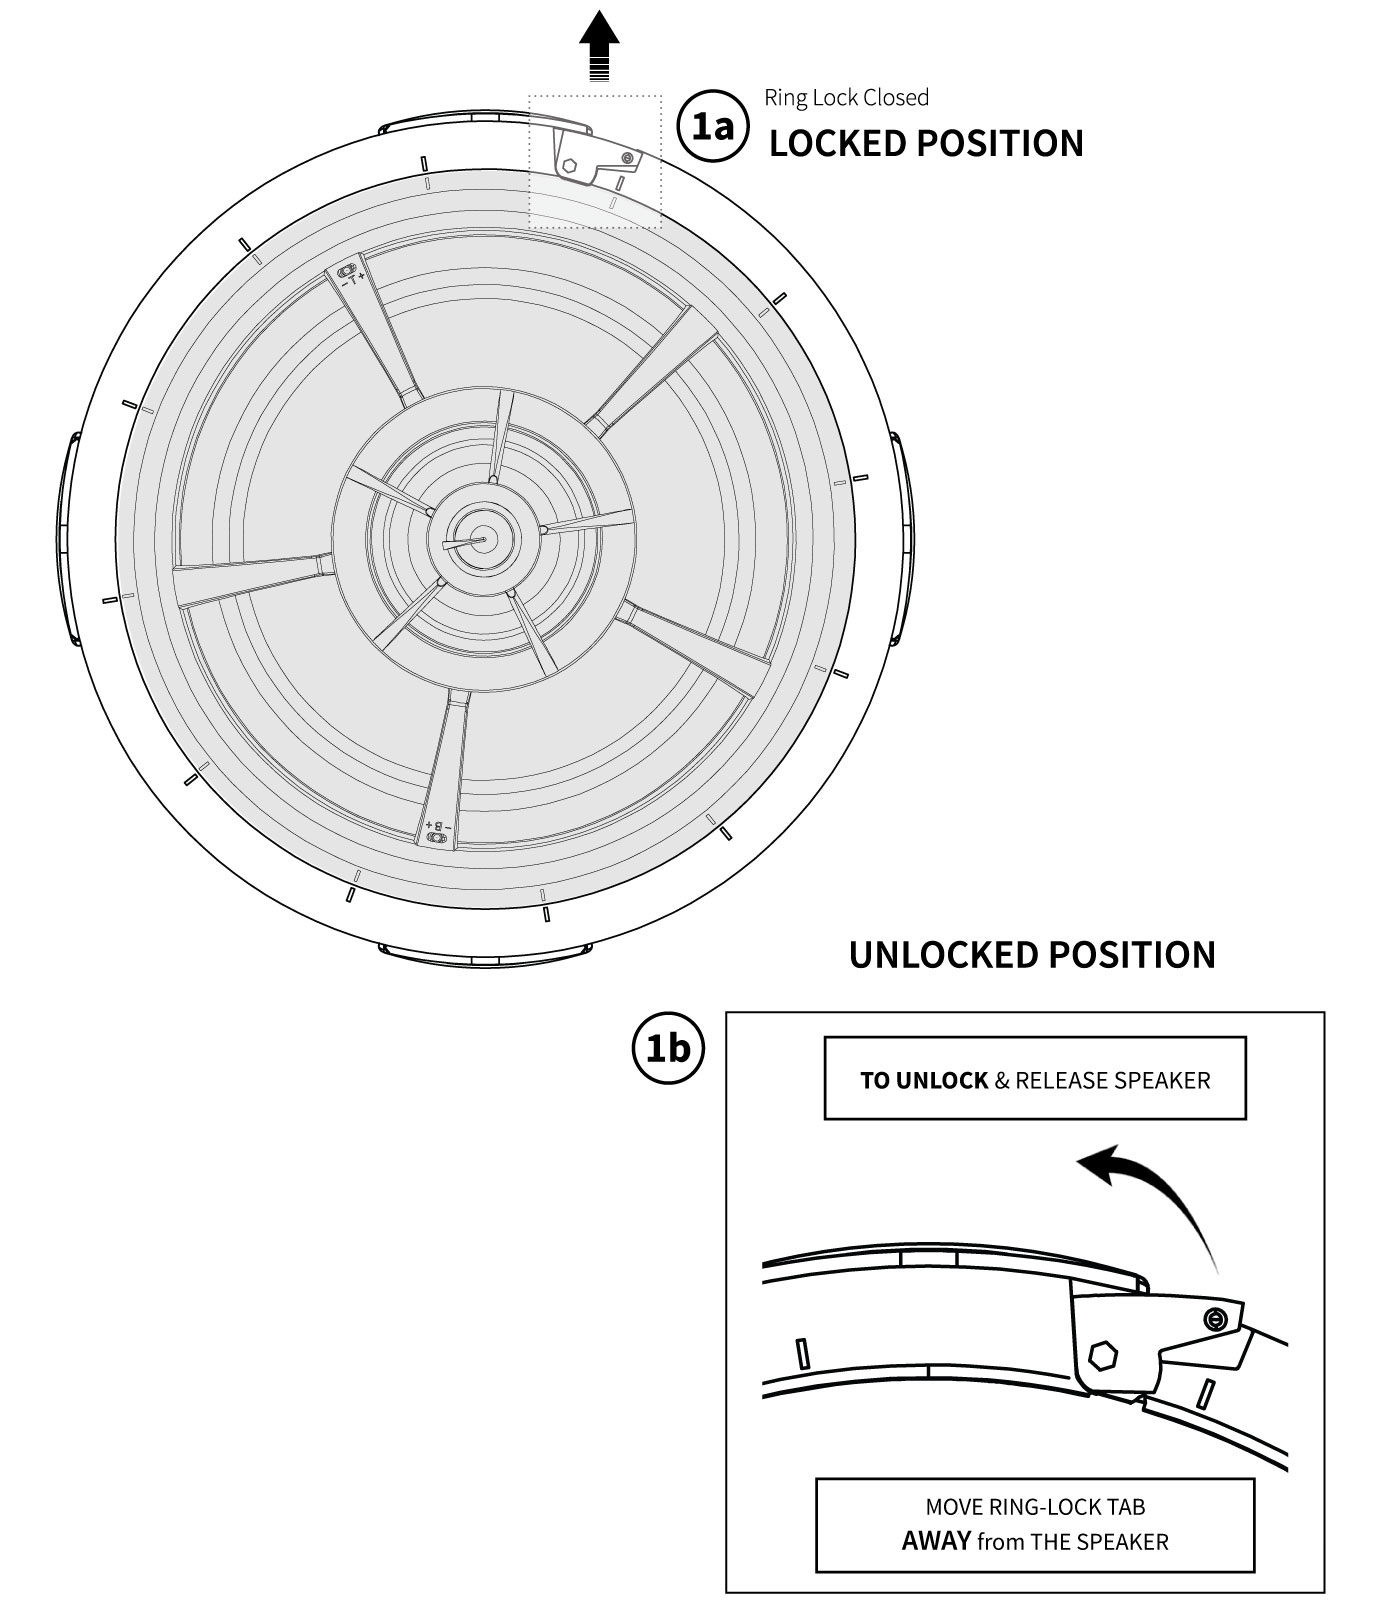
B) RING – LOCK Locks speaker into place inside Bayonet Ring. (Lift to release speaker. Lower to Lock.
C) BAYONET RAILS The Zip-KlipsTM Grips are raised & lowered along these rails.
D) ZIP – KLIPTM GRIPS Provide secure grip against drywall. With 2 finger grooves to pull down and lower. Zip-Klip™ Mounting System (Patent #9591390).
E) RELEASE TABS Press BLACK tabs inwards to release grip and raise Zip-KlipTM.
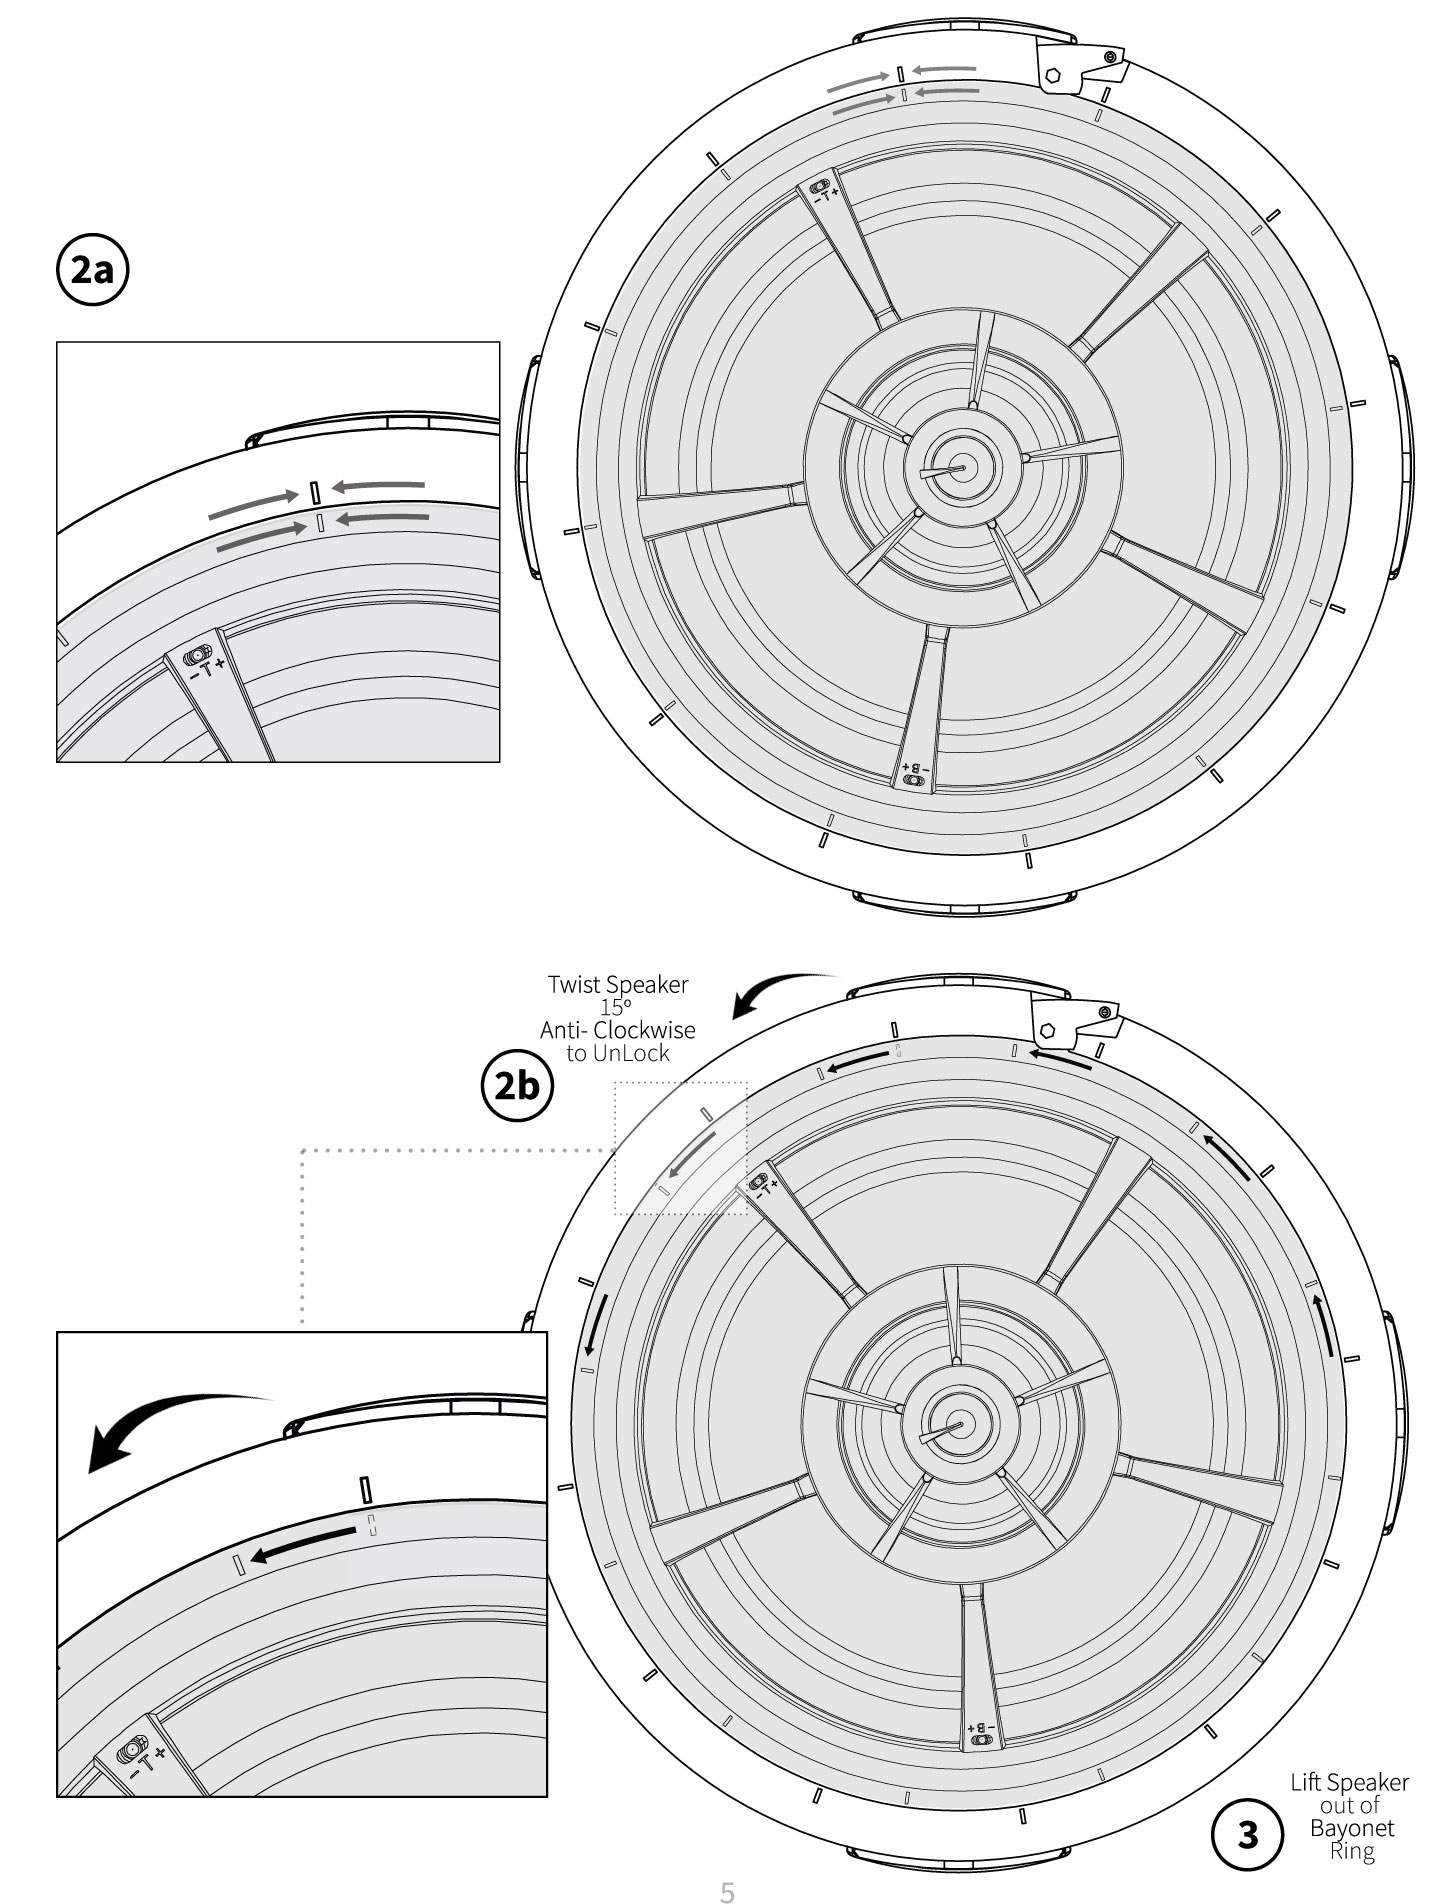
F) LOCK GROOVES Used to ALIGN & LOCK speaker inside Bayonet Ring.
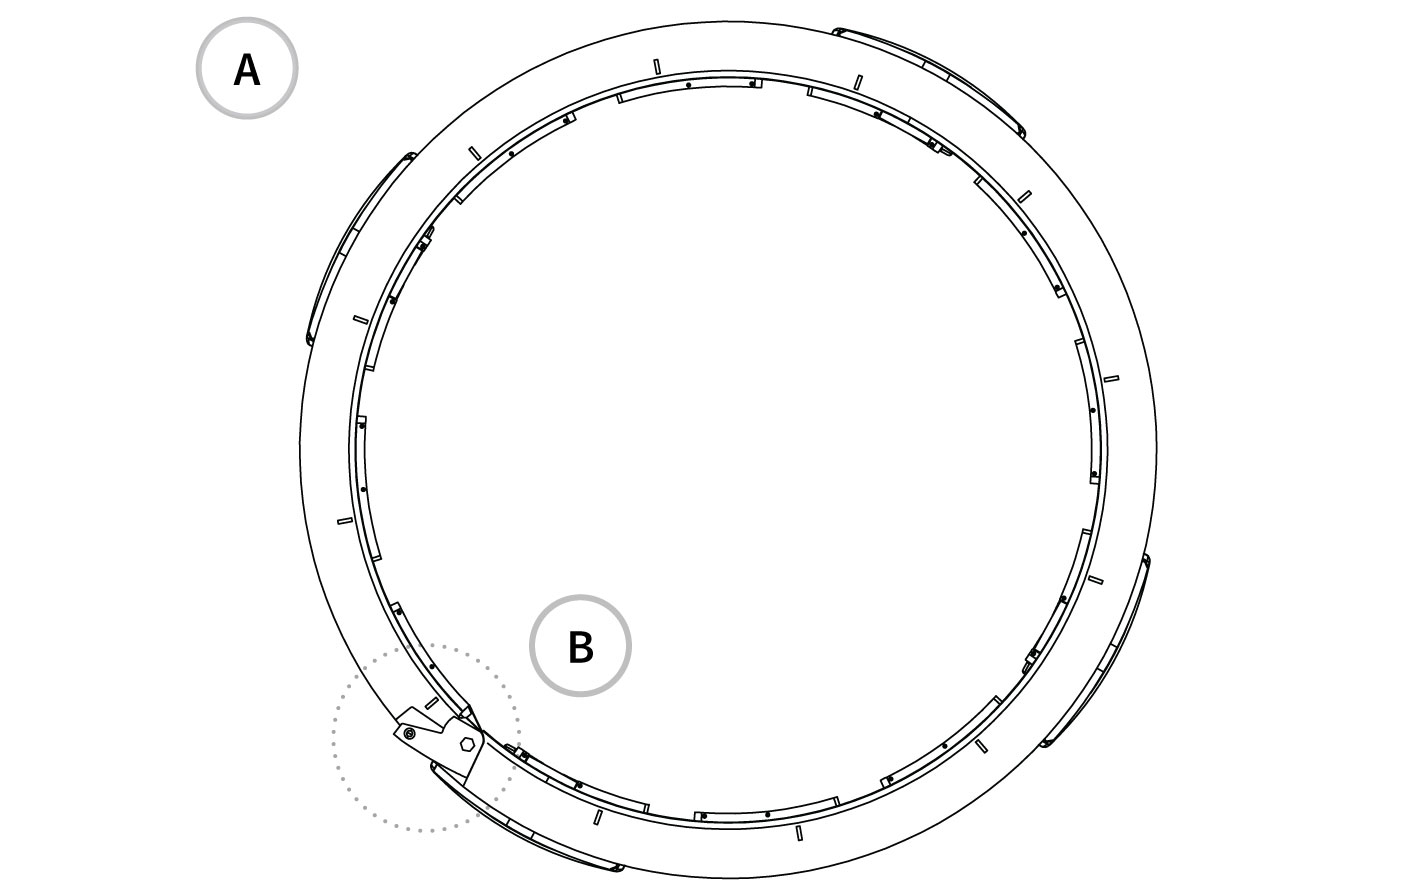
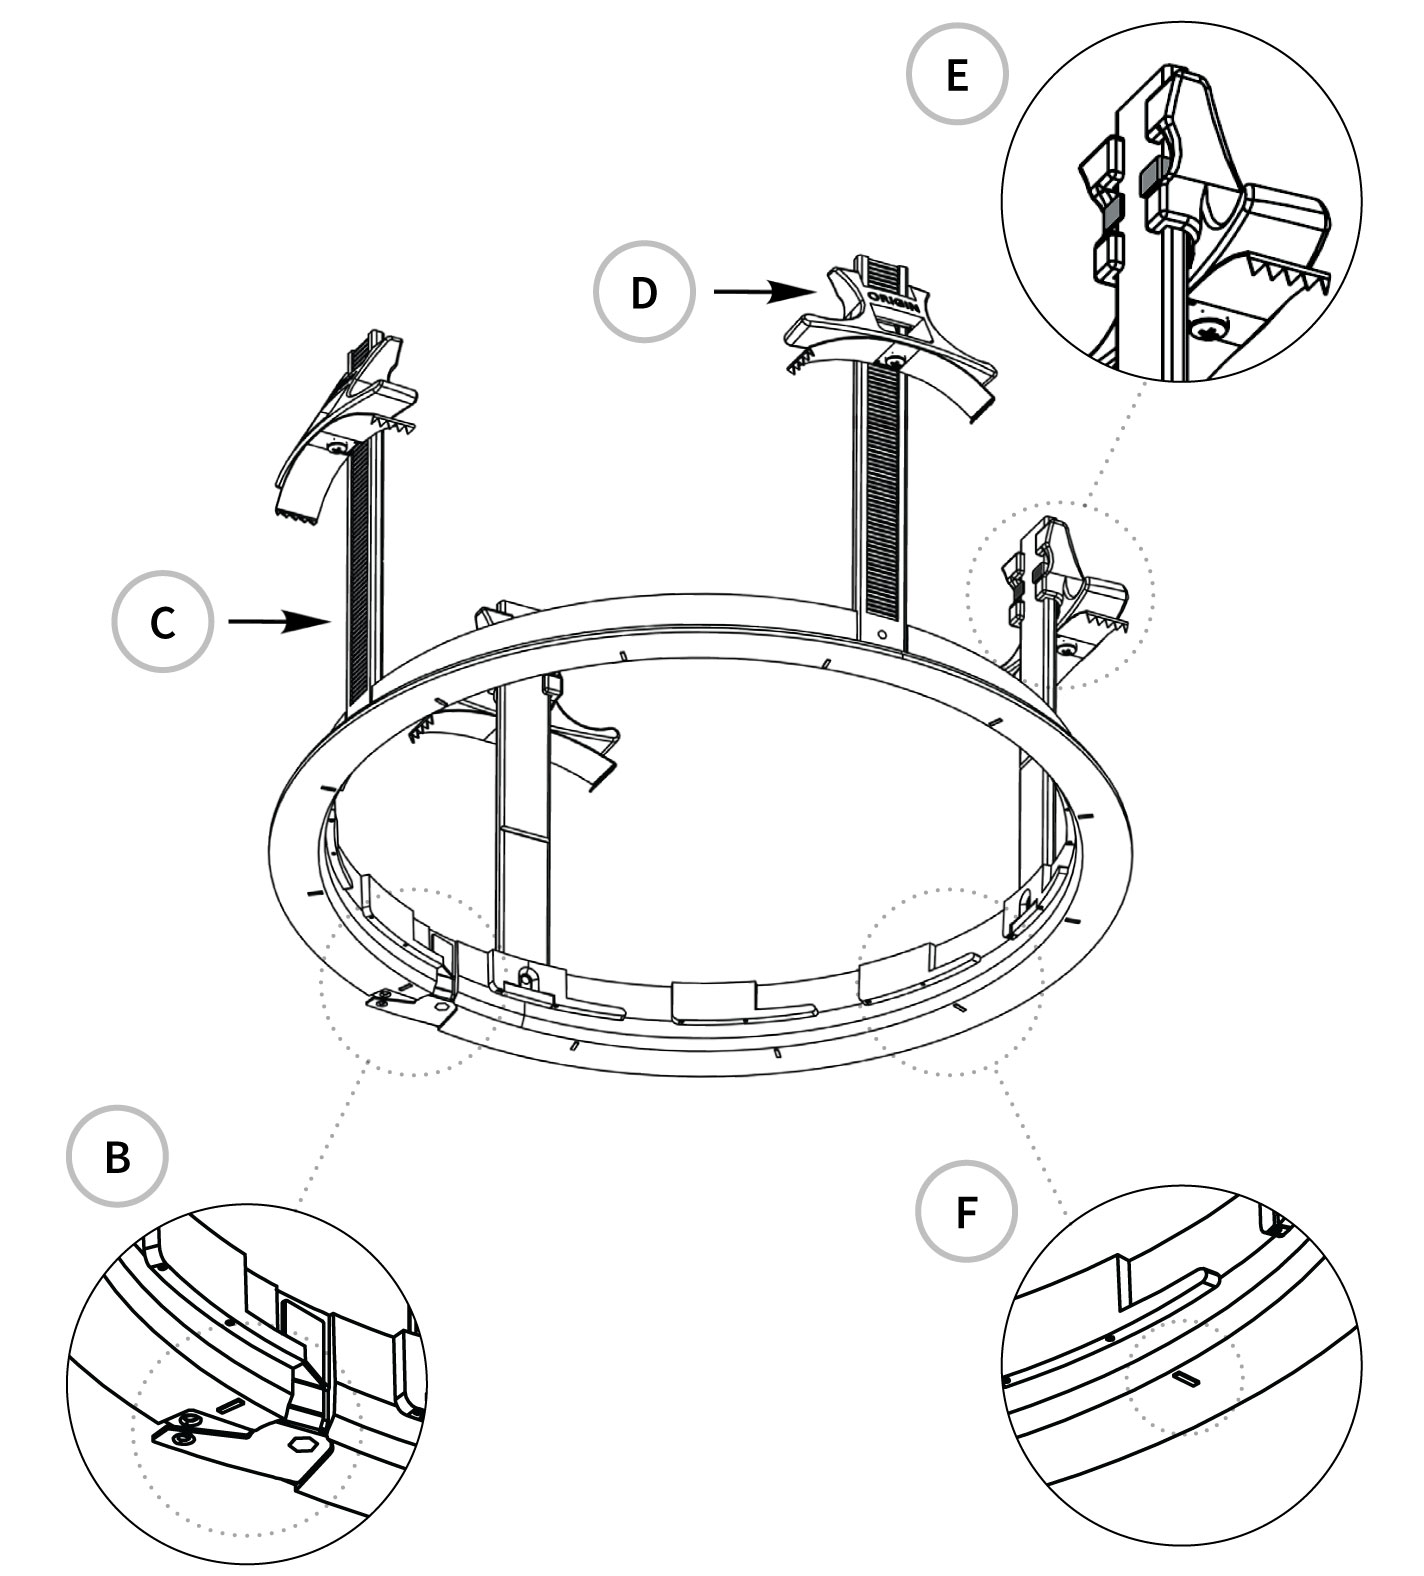
Releasing Speaker from Bayonet Ring
The speaker will arrive installed inside the Bayonet Ring. To release the speaker, follow these steps:
1) Unlock ring-lock tab on Bayonet Ring:
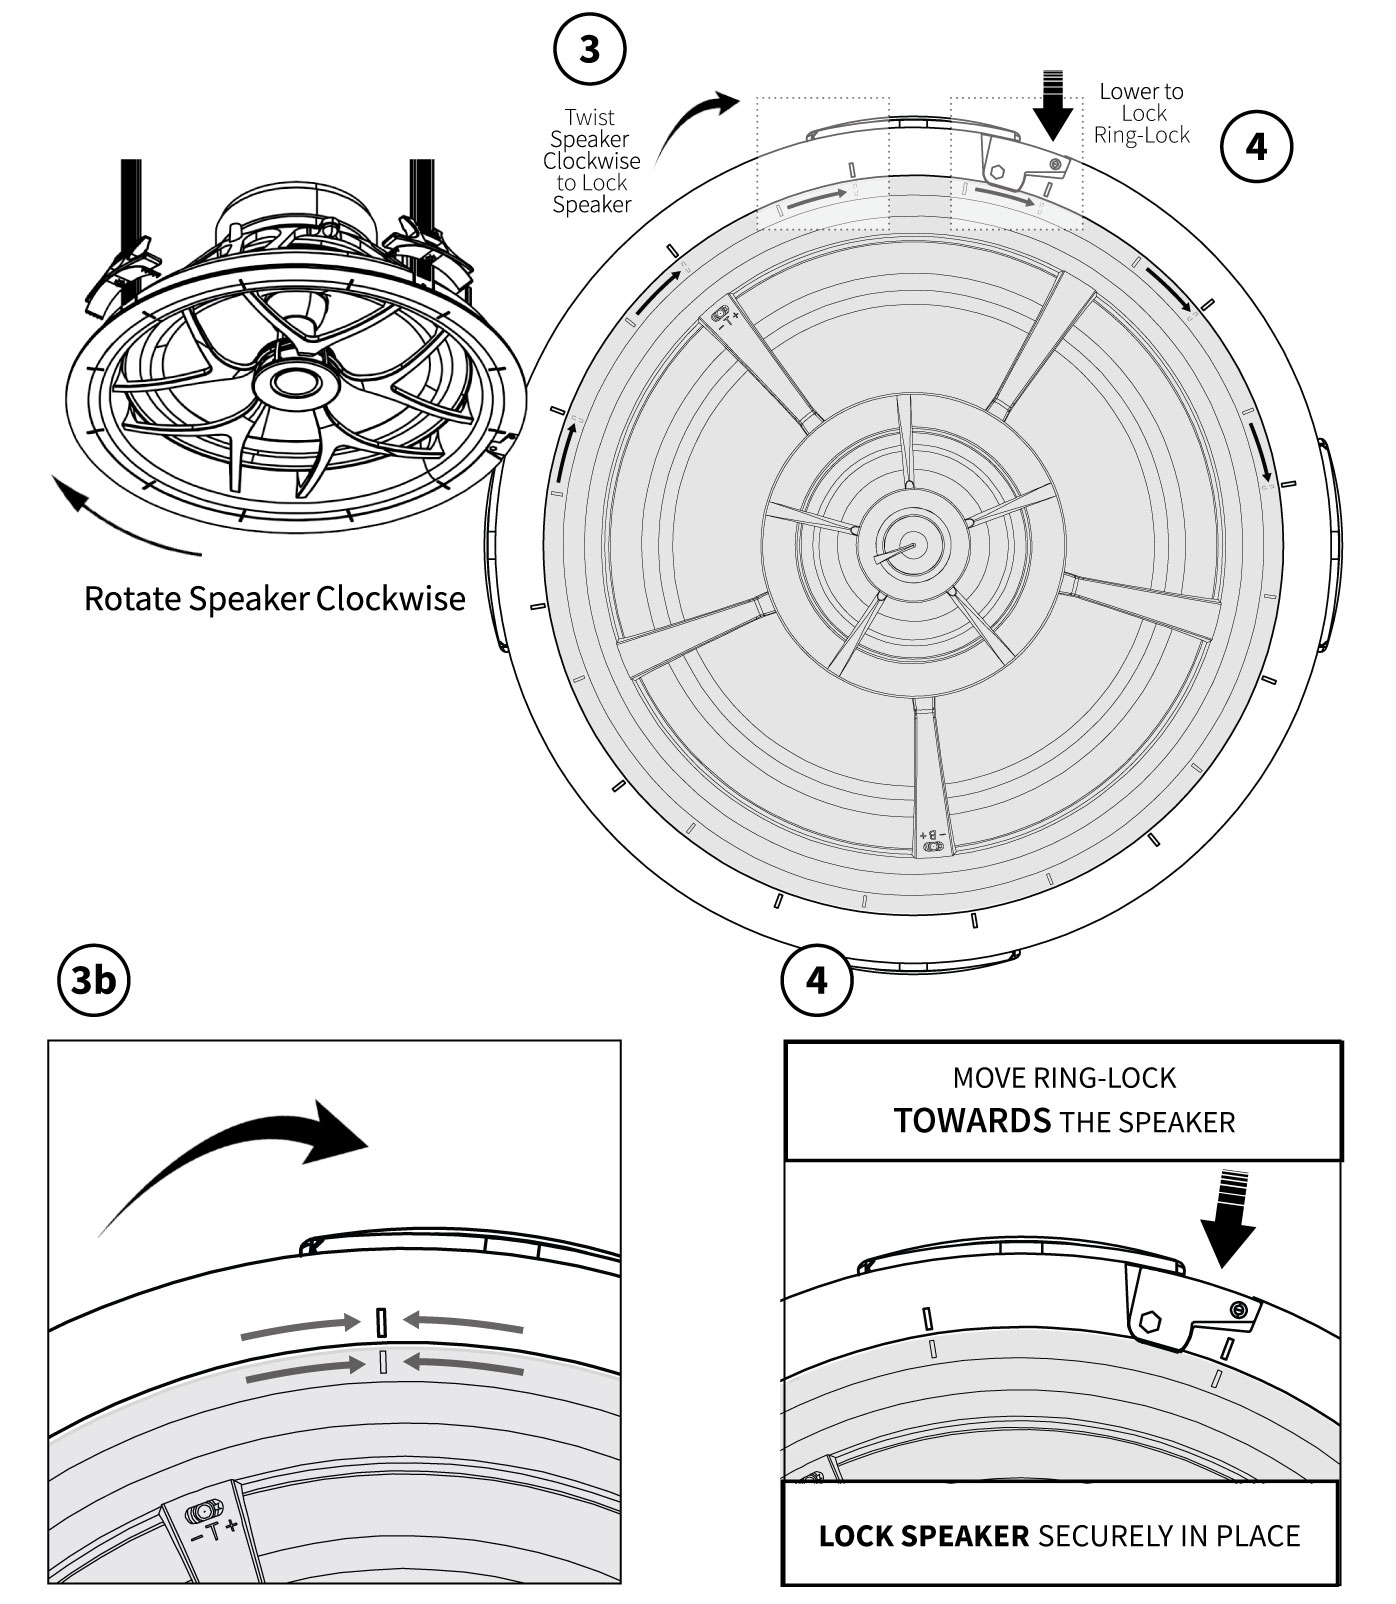
2) Rotate the speaker 15 degrees counter-clockwise, holding the bayonet ring in place, until you feel that it is unlocked. You will see that the grooves between the speaker and bayonet ring are no longer aligned. Here, the speaker can be lifted out from the bayonet ring.
Installing Bayonet Ring into Ceiling
1) Cut in-ceiling hole through drywall ceiling.
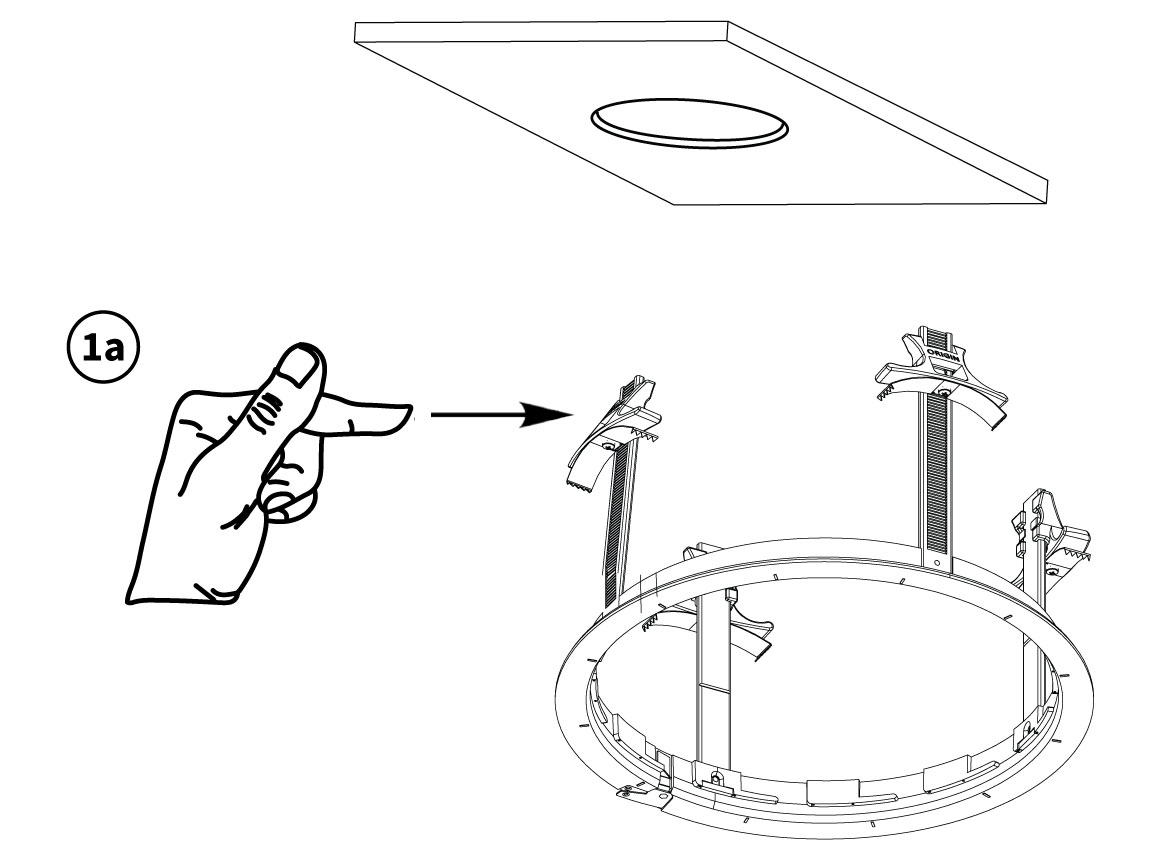
Push the Zip-klip™ inwards (from the top), just enough, so the rails fit through the ceiling hole opening, and place the bayonet ring through in-ceiling hole.
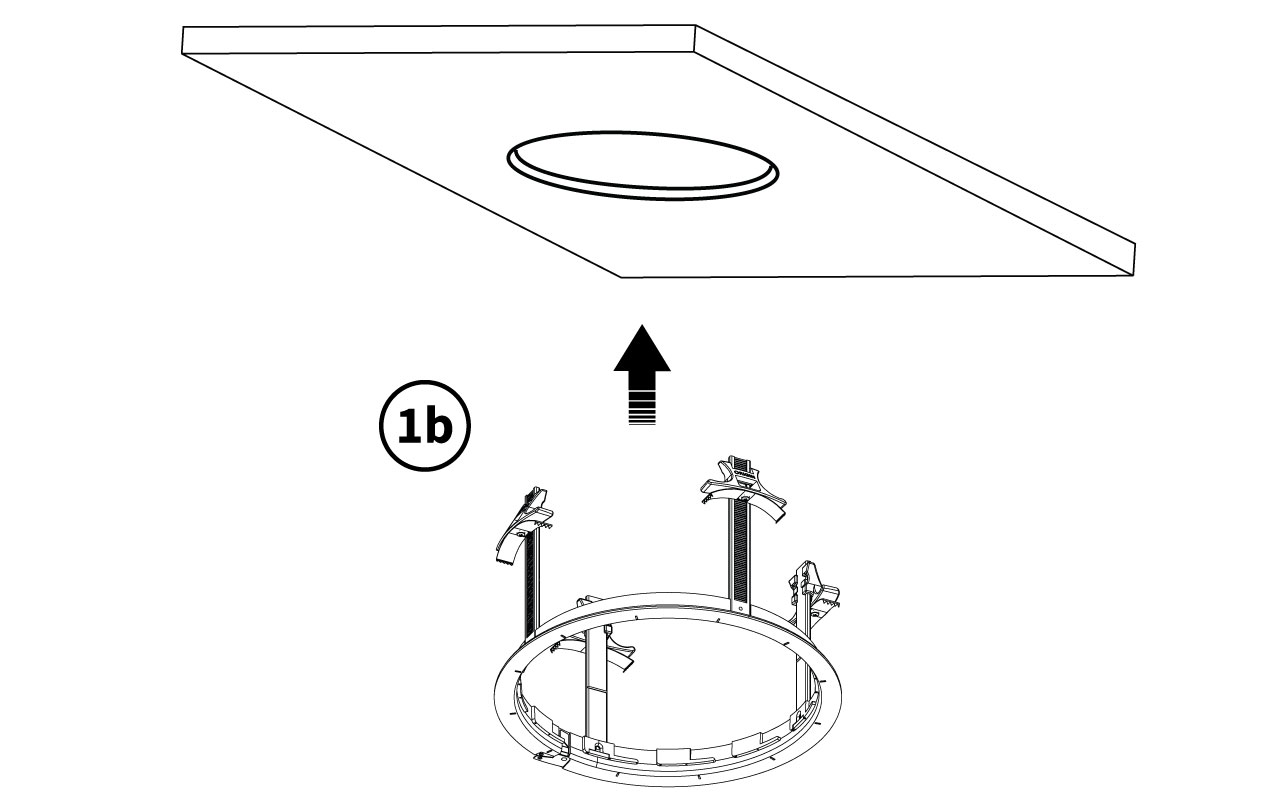
2) Once the bayonet ring is inside the ceiling hole, reach through and place 2 fingers on the grooves of the Zip-klip™.
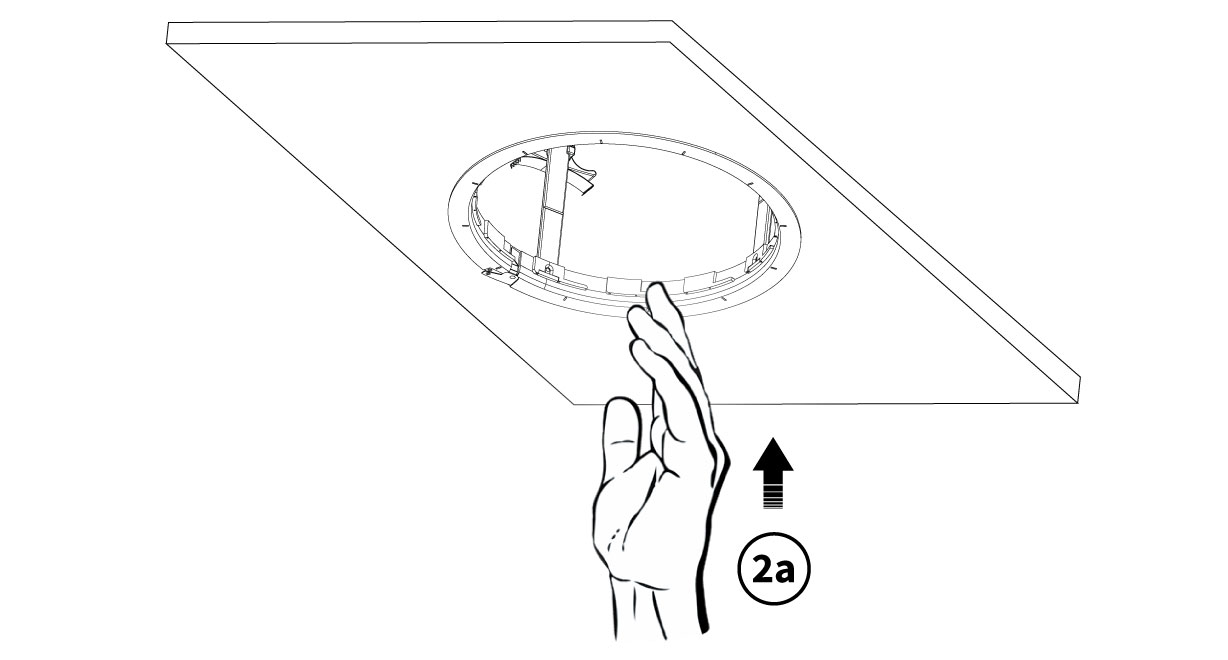
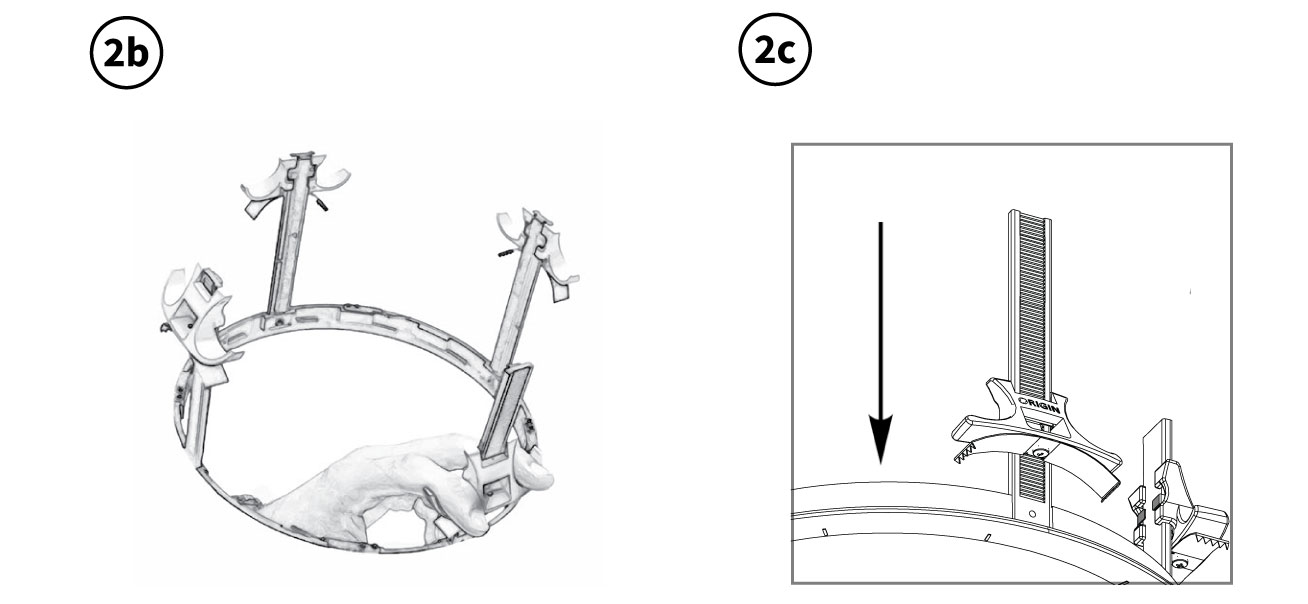
Pull down on the Zip-klip™. until it grips the drywall securely.
3) Repeat the process with all four (4) Zip-klip™. now bayonet ring is securely fastened to the drywall ceiling.
Installing Speaker into Bayonet Ring
1) Connect speaker wires and place the speaker into the bayonet ring. The speaker knobs will fit into the bayonet ring shelf opening.
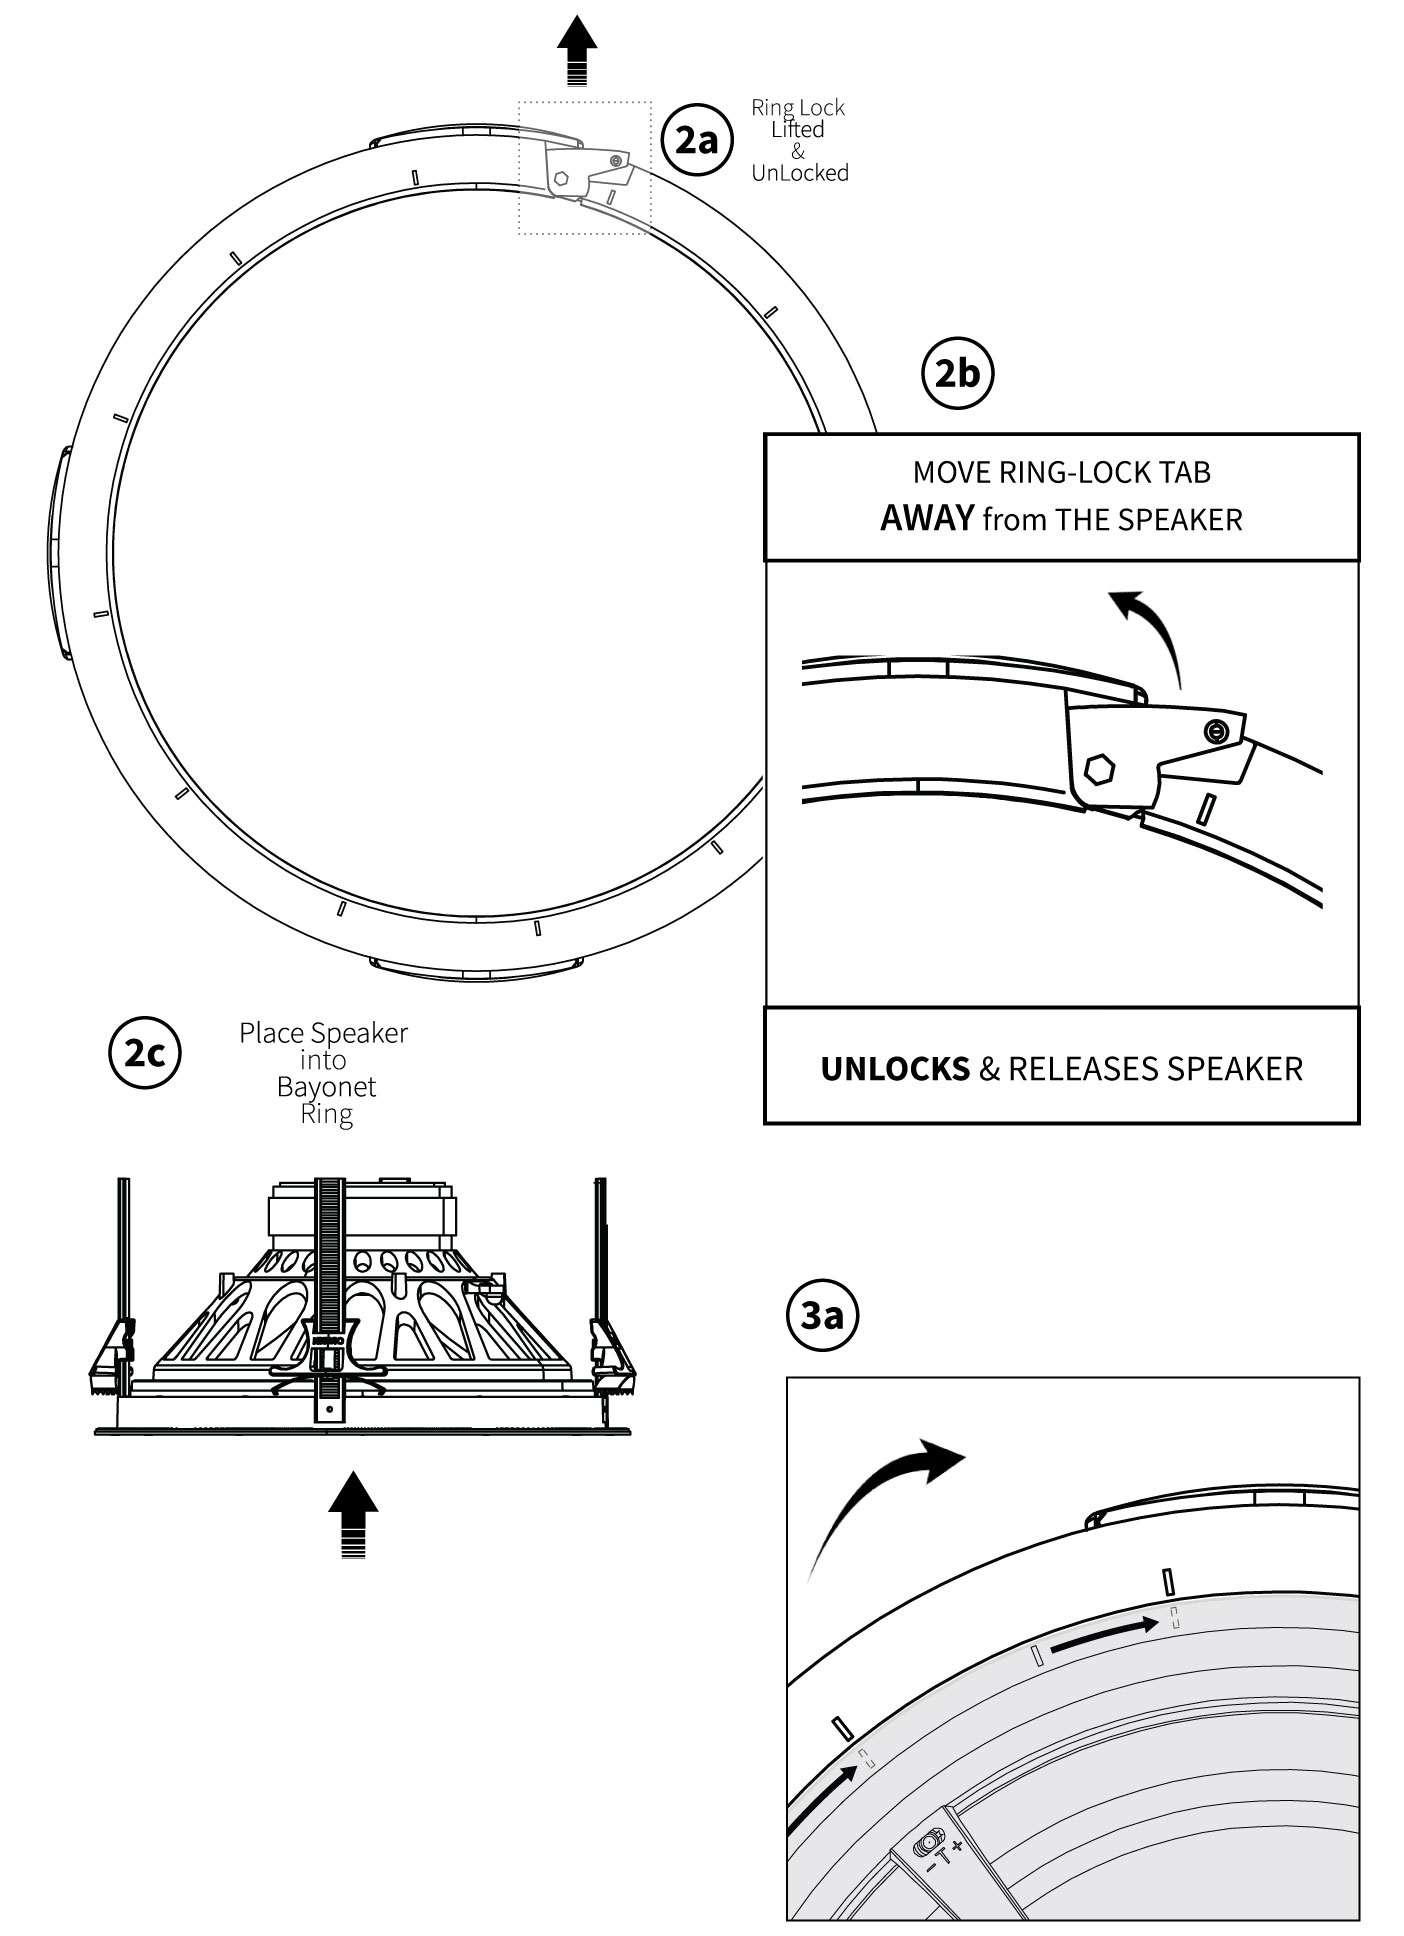
2) Push the Zip-klip™ inwards (from the top), just enough, so the rails fit through the ceiling hole opening, and place the bayonet ring through the in-ceiling hole.
3) TO LOCK SPEAKER INTO BAYONET RING, PUSH THE RING-LOCK INWARDS. When the speaker is correctly installed into the Bayonet Ring, the speaker groove lines will be aligned to the matching groove lines of the Bayonet Ring. Then you will be able to move the Ring-Lock Tab inwards, towards the center of the speaker. When the Ring-Lock Tab is fully closed, it will lay flush with the perimeter of the Bayonet Ring.
Releasing Bayonet Ring from Ceiling
Loosen Zip-klip™ grips to release bayonet ring from ceiling hole:
1) Press on both release tabs, on the inside of each Zip-klip™
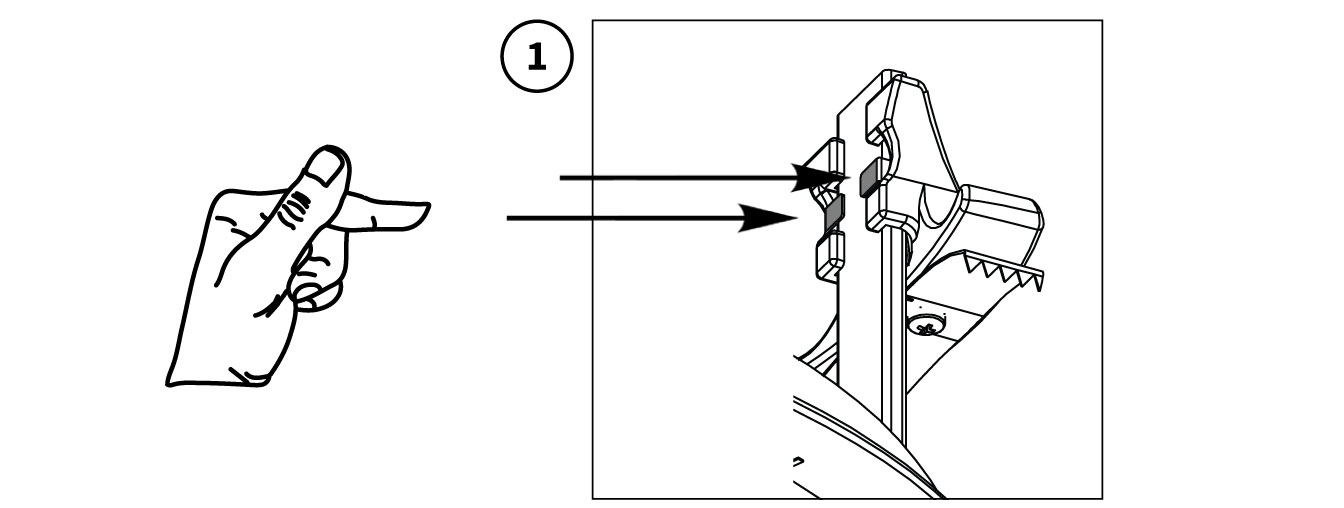
2) Slide the Zip-klip™ upwards along the rail, until you reach the top.
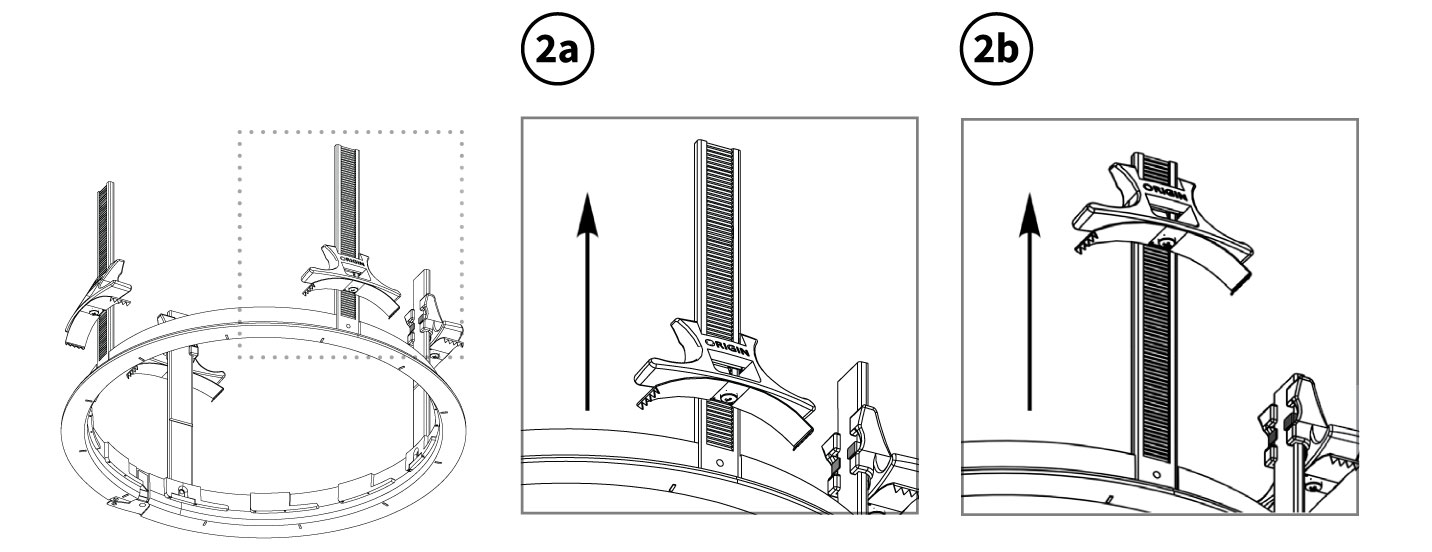
3) Repeat steps 1 & 2 to the rest of the Zip-klip™.
Wire Routing
Plan how you will route the wire to the desired speaker location. There are several methods for routing the wire, and you may need to combine several of them.
Behind the Baseboard
The wire can be routed behind the baseboard by cutting a groove out of the back of the baseboard, or by buying a special baseboard designed for concealing wires.
Attic or Basement
When available, you can route the wire through an attic or crawlspace.
Through Walls
When running wires through a wall, be sure to avoid all obstacles such as AC wiring, pipes, and ducts.
Under the Carpet
One option is to lift up the carpet and route “tape wire” under the carpet.
For New Construction
If these speakers are being installed in a new home during construction, the installation process will be a bit different (although much simpler). For these situations, it is recommended you purchase a bracket. Instructions on how to install the speakers are provided with the bracket, or can be found on our website. Visit www.originacoustics.com for more information.
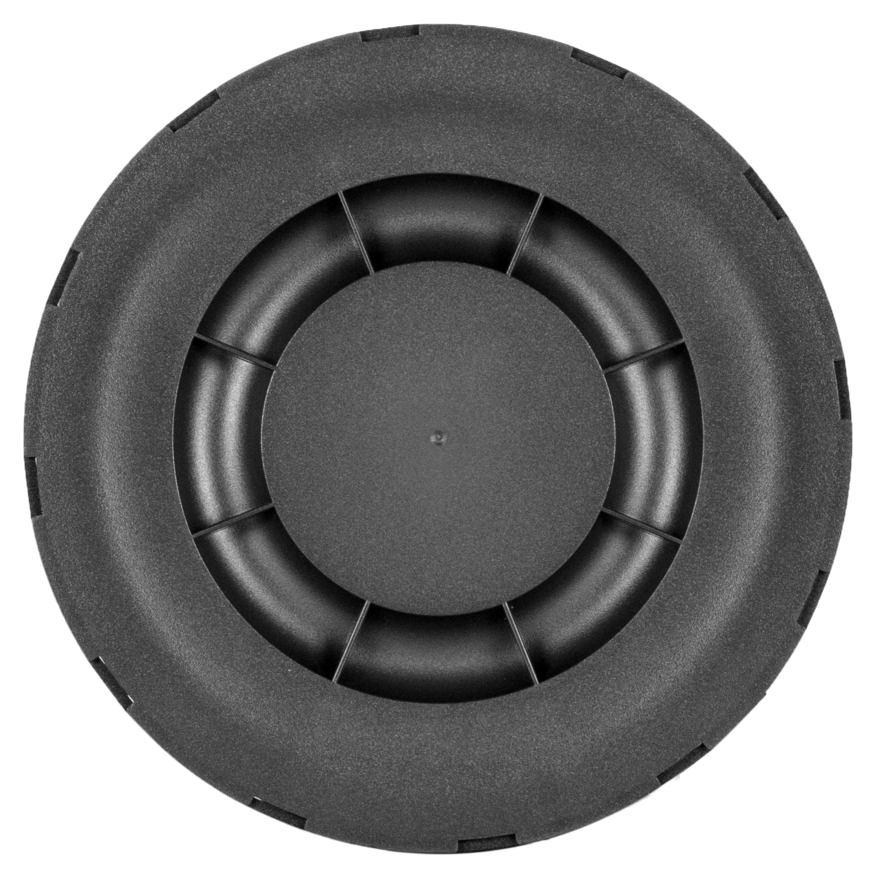
BC68 Cover Plate
Origin Acoustics offers:
• BC68
• BZ68BC-8 BUNDLE (8-Pack)
The Bayonet Cover from Origin Acoustics gives you the flexibility you need. If you are wiring a new house, or retro-fitting an established home, with the BC68 there’s no need to install the speakers until the client is ready for them.
With the BC68 Cover Plate, you can prewire a home, precut and install the bayonet ring, all before a pressure test, keep unwanted substances out of your clients’ attic, and protect your wiring before the final install.
Each cover provides a clear space for the Dealer Sticker to be placed onto the cover plate, ensuring future business.
Troubleshooting
If you have a problem, try isolating it first. For example, if you’re playing a DVD and there is no sound, try replacing the DVD with an MP3 player to see if you get sound. If it does work, then the problem is with the television, DVD player, or the cables connecting them. If it doesn’t work, the problem will be with the amplifier, speakers, or those cables.
Common Solutions
| PROBLEM | POSSIBLE CAUSES |
|---|---|
| Can’t Take speaker out of Bayonet Ring | Ensure that the RING-LOCK is not ENGAGED. Move Ring Lock Tab Outwards (AWAY from Speaker) to UNLOCK. |
Technical Assistance
If you have any questions or concerns about installing or using this product, you can reach us through one of the following methods:
Phone: (844) 674-4461
Hours of operation: 8:00am – 5:00pm (Pacific Time), Mon – Fri
Email: sales@originacoustics.com
If you are having technical trouble, please include the model number and briefly explain what steps you took to resolve the problem in your email, or be prepared to answer these questions over the phone. If you are considering returning the product, it’s required that you contact Origin Acoustics prior to any return attempts. This way we can determine if the issue can be resolved without returning the product, or if needed we can provide instructions and support for the return process.
Return Process
Before making any return attempts, it is required that you first contact Origin Acoustics. Return product to Origin Acoustics or your dealer, either in person or by mail. It’s preferable if the product is returned in the original packaging. If this isn’t possible, the customer is responsible for insuring the shipment for the full value of the product.
This warranty is in lieu of all other expressed or implied warranties. Some states do not allow limitations on implied warranties, so this may not apply depending on the customer’s location. (For more information, see Magnuson-Moss Warranty Act.)