Flush Mount Bracket Installation Steps

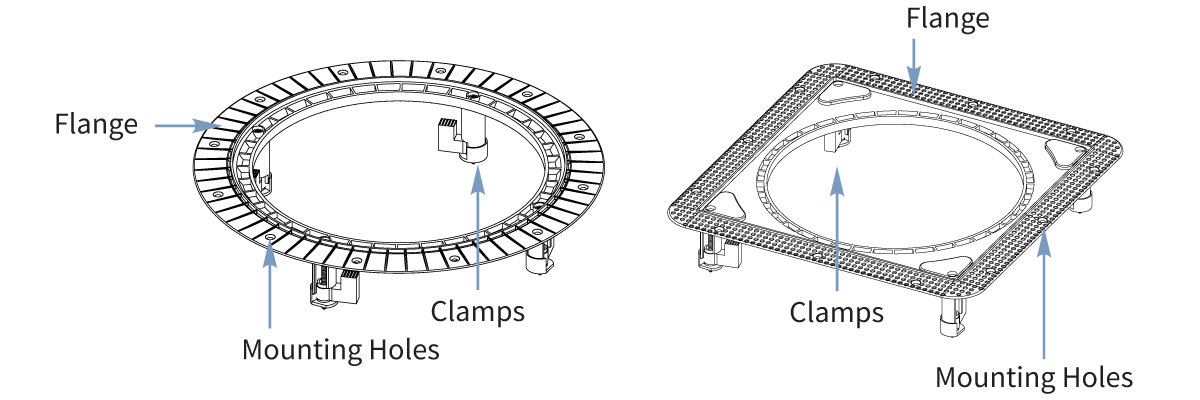
FLUSH MOUNT BRACKET
FMKD68RD – Round | FMKD68SQ – Square
Fits 6” & 8” Director Series Speakers
1.) CUT Cut out ceiling hole using the included Cut-Out Template. (Sizes as follows: 10 5/16’’ (262MM) ROUND | 10 1/8’’ (257MM) X 10 1/8’’ (257MM) SQUARE)
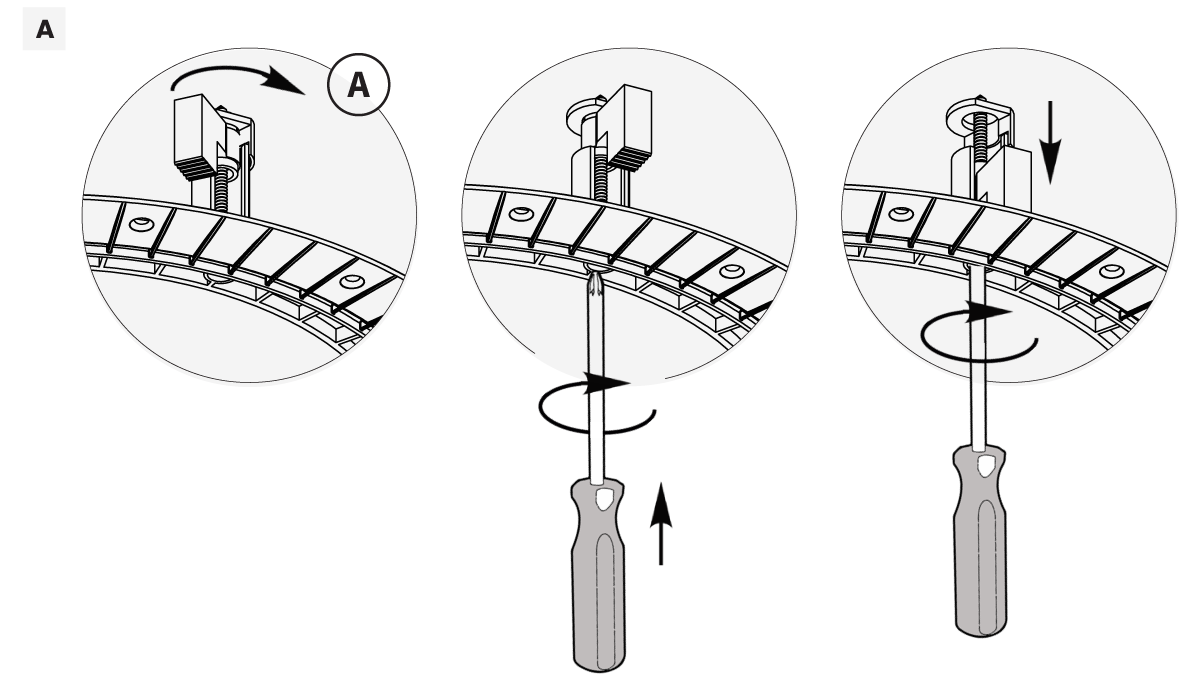
2.) INSERT Insert the flush mount kit within the in-ceiling hole, and ensure it sits flat against the drywall. (See illustration A.)
3.) CLAMP Use a Philips screwdriver to turn the screw inside each clamp. This will tighten the clamps and secure the bracket against the drywall. (See illustration B.)
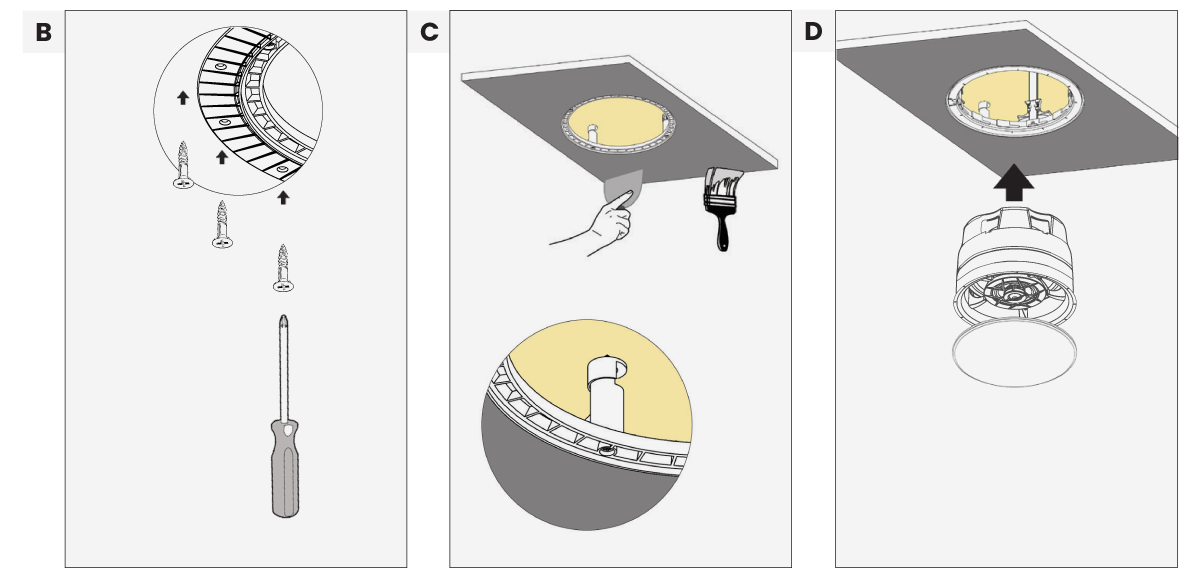
4.) SCREW Use a screwdriver/drill to drive drywall screws through the mounting holes of the flange, to secure the flush mount bracket into the drywall. (See illustration C.)
5.) DRYWALL Apply joint compound over the bracket to seal and blend the bracket into the ceiling.
6.) FEATHER OUTWARDS Begin applying the joint compound 6 – 8 inches (152 – 203 mm) from the bracket edge and then feather outward 16 – 20 inches (406 – 508 mm) to achieve a smooth and flat transition. (See illustration D.)
7.) INSERT BAYONET RING & DIRECTOR SPEAKER

